Stream DirectX Sample in Local Test Mode
Once you have set up your Twitch extension you can run and test the sample.
Note
This information is dependent upon systems maintained by Twitch. We do our best to keep it updated, but you should see the Twitch developer documentation for the latest information.
Add the Genvid Libraries
From the Genvid MILE SDK root folder:
Go to the
api/web/distfolder.Copy
genvid.umd.jsandgenvid-math.umd.js.Paste both files to the
samples/cube/twitch-extension/jsfolder.
Add the Three.js Library
The Genvid MILE SDK uses Three.js to draw 3D overlays over objects using synched data.
Note
Twitch extension sample is only compatible with three.js version r149. You can download the library from the official Three.js Github.
Put the
three.jsfile in the/samples/cube/twitch-extension/jsfolder.In
/samples/cube/twitch-extension/video_overlay.htmladd a<script>tag inside theheadelement with ansrcattribute pointing to the file you just downloaded.For example:
<script src="js/three.js" type="text/javascript"></script>
Host the Front-end Files
To set up your local server, you need to install and run http-server where the front-end files of your Twitch extension are hosted. (See the Twitch developer extension local testing documentation for more information.)
Go to the
samples/cube/twitch-extensionfolder.Make sure you run a Node.js version that is compatible with http-server as the version supported by the Genvid SDK might not be compatible.
Use the command
nvm use {version number}to change the version you’re using. For example:nvm use 18.16.0
Run http-server on a specific port:
http-server -p8081
At this point the server is running and waiting for requests.
Set the Configuration Service for the Local Cluster
Now you set the endpoint to connect to your cluster. This allows it to authenticate and connect to a web socket. See the Twitch documentation for details on how to configure your Twitch extension.
Set your Twitch extension on Overlay 1.
Click the configuration wheel.
Under Web API Gateway Server, paste
http://[::1]:{web_server_port}/api/public/channels/joinReplace
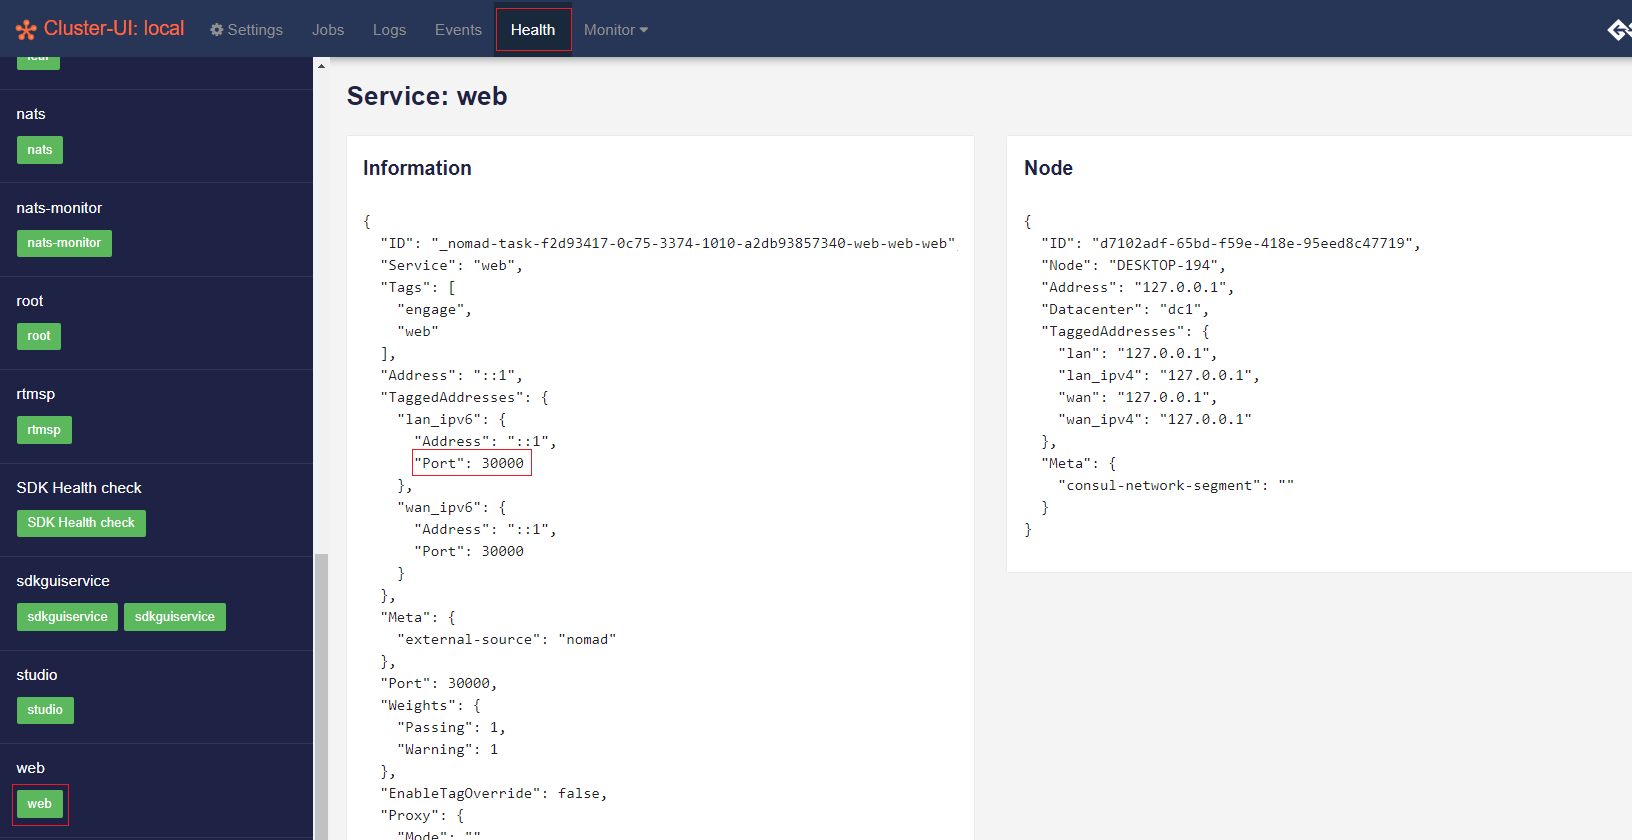
{web_server_port}with the port for your cluster. To find the port number:Go to the Health page of your Cluster UI.
Click web.
Copy the
Portvalue.
Click Apply.
Set the Configuration Service for the Cloud Cluster
Now you set the endpoint to connect to your cluster. This allows it to authenticate and connect to a web socket. See the Twitch documentation for details on how to configure your Twitch extension.
Set your Twitch extension on Overlay 1.
Click the configuration wheel.
Under Web API Gateway Server, paste
https://<cluster>/api/public/channels/joinReplace
<cluster>with the name of your cloud-cluster web endpoint. To find it:Go to the Settings page of your Cluster UI.
Click Config.
It will be the value associated to the cloud/endpoint/web key.

Click Apply.
To finish, go to the Stream Manager page of your Twitch Creator Dashboard.
Allow your extension in the overlay.
Select your extension from the list of extensions.
Use the popup to allow sending authenticated admin commands.